Unlike your normal plug-in appliances, a dishwasher must be hardwired and hooked up to your plumbing. But, if you’re up for the challenge of installing it yourself to save some money, keep on reading.
Words of wisdom
Installing an appliance like a dishwasher seems like a daunting task. But, with the right information and instructions it can be quite a rewarding DIY. To keep things simple, always replace your current dishwasher with a newer version of the same model or something that is similar in size.
If your kitchen never included a dishwasher before, a hefty amount of renovating must be done–however that’s beyond the scope of this blog. Nevertheless, if your new appliance fits snugly into the space left behind by the old one, this blog can walk you through the installation process.
Tools and Materials
- Tools
- Tubing cutter
- Adjustable wrench
- Hose clamp
- Cable clamp
- Wire strippers
- Level
- Drill
- Materials
- ½ inch flexible copper tubing
- ½ inch compression fittings (2)
- Tube-bending spring
- Brass plumbing elbow
- Electrical wire nut
- Plumber’s strapping
- Teflon tape
Step by step
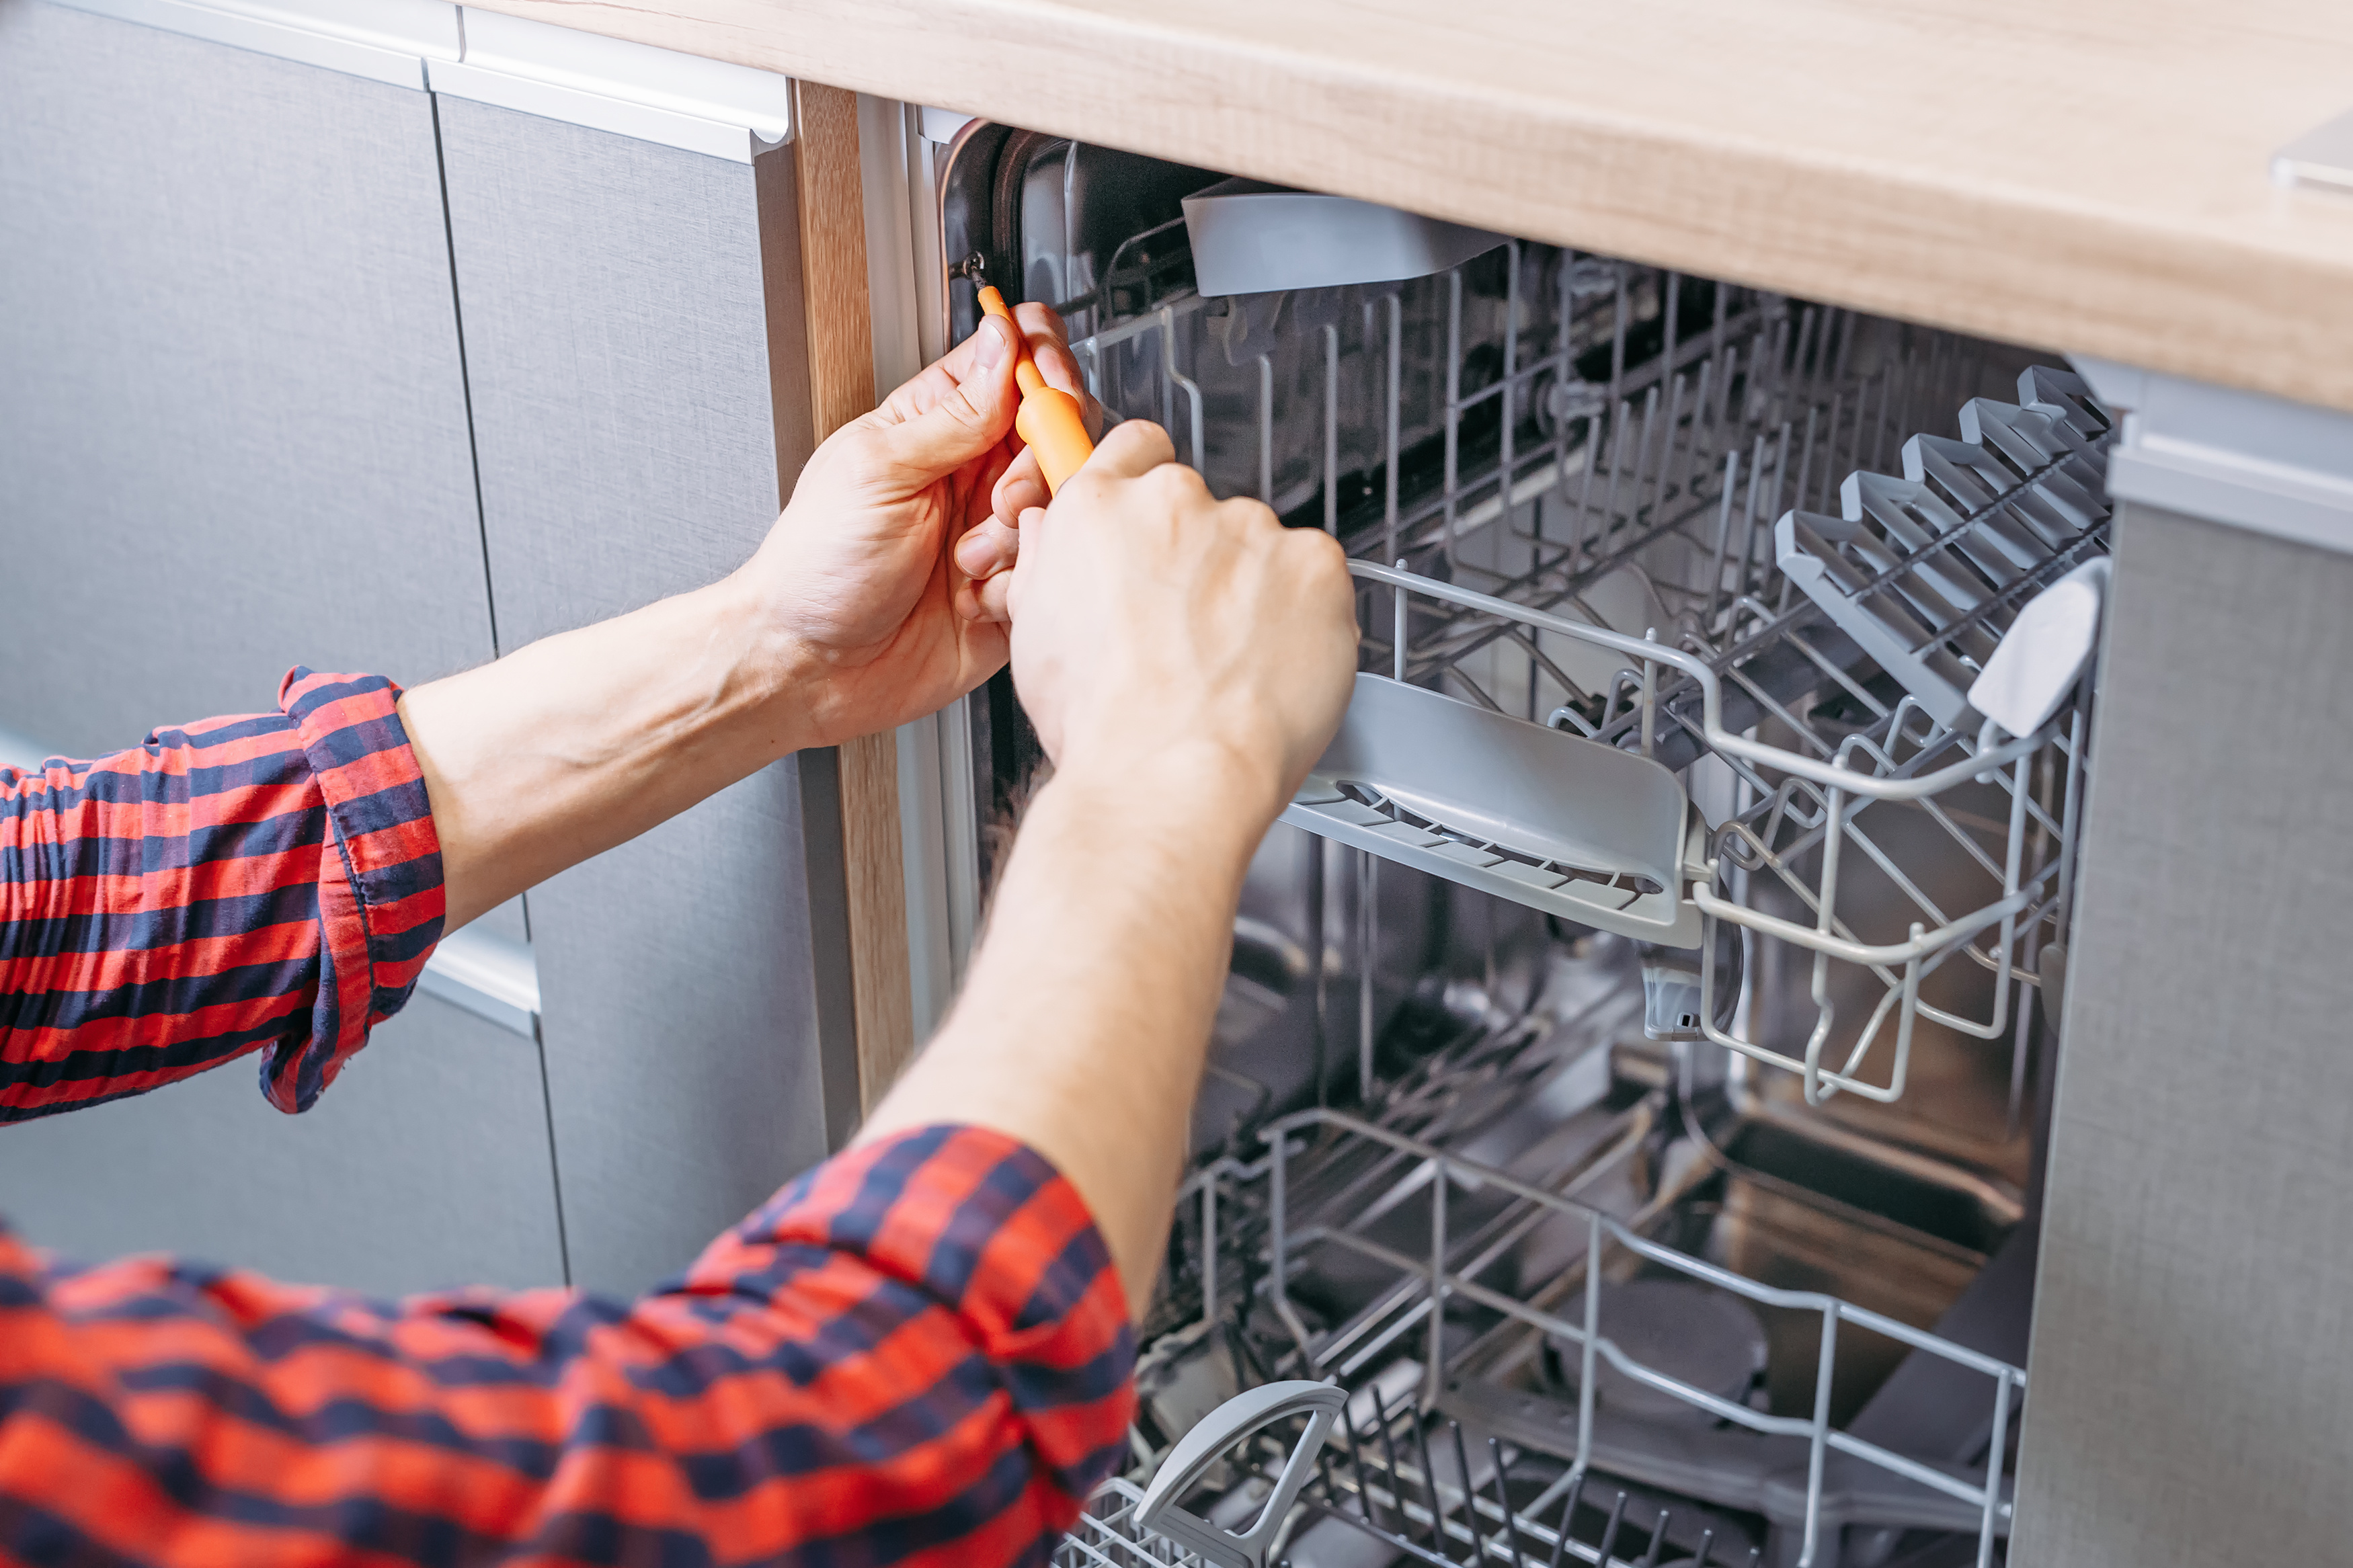
- If your current dishwasher is still in place it’s time to remove it! First, shut off the water and power supplies to the unit. Then from there you can break the three connections that allow the dishwasher to do its job: the drain line, the water supply, and the electrical supply.
- Now that the old dishwasher is out of the way, you can now do the appropriate prep work on the connections. Existing electrical wiring can be used, but it’s a good idea to replace the water supply line–unless the existing line is copper, if that is the case skip to STEP 3. To replace the water supply line, first remove the old braided plumbing line. Then begin snaking ½ inch flexible copper tubing from the front of the dishwasher cabinet to the hot-water valve under the sink. Once you’ve done that, use a tube cutter to cut the line away from the remainder of the tubing coil.
- Maneuver the tubing as close as you can to the hot-water valve found under the sink. To make the proper connection, you may have to use a tube-bending spring. Secure the connection with a compression nut, tighten the nut with your hands and then finish tightening with a wrench.
- Locate the channels on the bottom of the dishwasher where the water supply and electrical lines are meant to run. Measure their locations and then transfer those measurements to the floor of the cabinet. Now use the tube-bending spring to shape the copper tubing so it fits your measurements appropriately. Be sure to do the same for the electrical cable.
- Every new dishwasher comes with its own drain hose–do not use the old one! Take the new hose and run it from the dishwasher cabinet to the area under the sink. As you do this step be careful not to kink the hose.
- Next, remove the panel cover at the base of the unit to access the clean water inlet. From there wrap Teflon tape around the threads of the inlet and use a wrench to attach a brass elbow. Now, using the tube-bending spring, turn the flexible copper supply like so that it meets the brass elbow you’ve added. Secure the connection between the tubing and the elbow by putting a compression fitting over the straight run of copper. Tighten the compression nut with your hands then finish tightening with a wrench.
- Time to focus on the electrical cable. Slide a cable clamp over the exposed wires, right where the wires meet the plastic/metal sheathing. Locate the junction box on the dishwasher and remove its cover plate. Loosen the nut on the cable clamp and push the wires through the junction box’s hole. Use a screwdriver to tighten the clamp outside the junction box.
- Inside the junction box, use wire nuts to join identically colored wires. Finally, fold all wires into the junction box before screwing the cover plate back on.
- In STEP 5, you ran the drain hose from the dishwasher cabinet to the sink drain–now it’s time to get connecting. First, slip a hose clamp over the “sink side” of the hose then attach to the inlet on the sink drain. With plumber’s strapping, secure the hose against the top of the cabinet in a U-shape to prevent backflow. Then in the dishwasher cabinet, connect the other side of the hose to the dishwasher’s drain.
- Slide the dishwasher into place and adjust its feet until the mounting brackets meet the counter. Check that the appliance isn’t tilted to one side by using a level. Then using a drill, drive screws through the mounting brackets to secure it in position. Replace access panel cover from STEP 6.
- Turn the water and power supplies to which the dishwasher is connected to back on. Do not turn on the dishwasher. Instead wait a couple of hours to watch for leaks. If there aren’t any, it’s time to let your dishwasher handle the dirty dishes!
Having Troubles?
Are you realizing that appliance installations aren’t as easy as you thought? No worries – a technician from Terry’s Plumbing can come out and take care of installations for you. Give us a call today to get an estimate for your project!
 How to Keep Your White Bathroom White
 How to Find the Model Number of Your Toilet
 Plumbing News Roundup: March 2024

