Your garage serves many purposes – protecting your vehicles, housing your workshop, or providing extra storage space. But when water starts pooling around your garage floor drain instead of flowing away, it’s time to take action. A clogged garage floor drain isn’t just inconvenient; it can lead to water damage, unpleasant odors, and potential safety hazards.
At Terry’s Plumbing, we’ve helped countless homeowners tackle this common problem. While many garage floor drain clogs can be resolved with some basic DIY steps, knowing when to call in the professionals can save you time, money, and frustration.
Before diving into solutions, it’s helpful to understand what type of drain you’re working with. Most garages feature one of two drain styles:
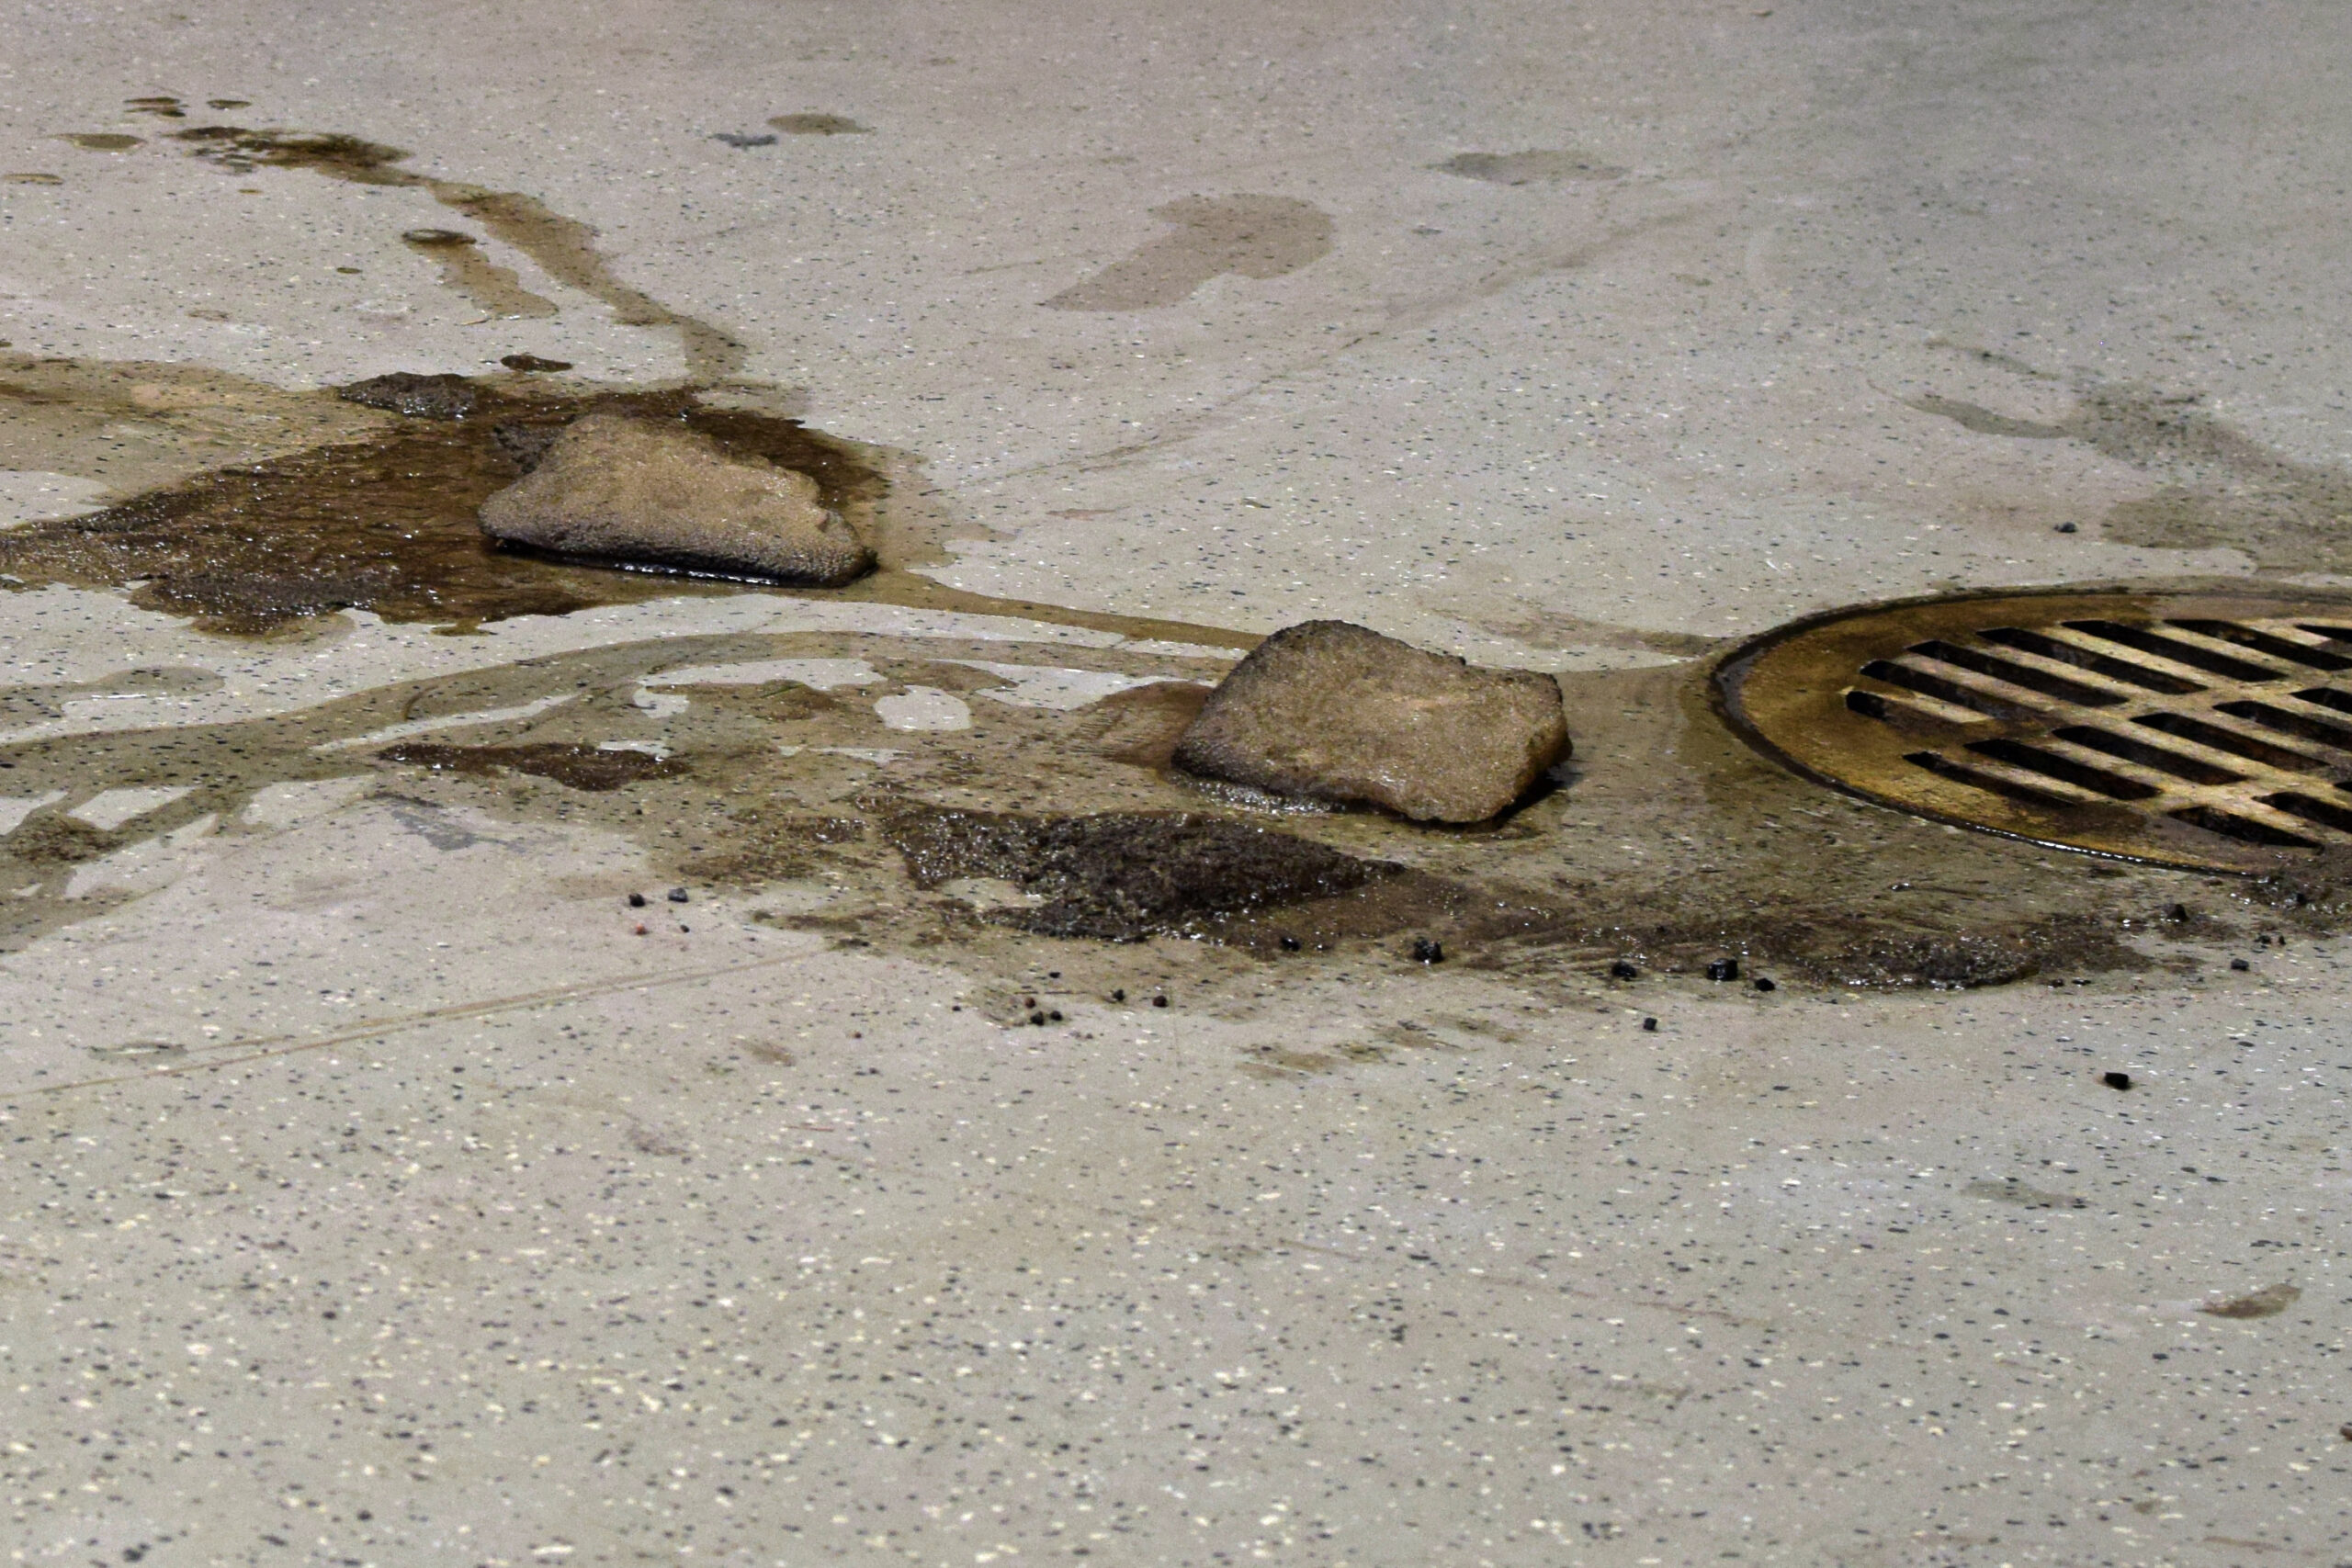
Round Floor Drains are the most common and budget-friendly option. These circular drains, typically about a foot in diameter, sit in the center of your garage floor with a metal grate covering the opening. The concrete floor slopes gently toward the drain to direct water flow.
Trench Drains (also called channel drains) are rectangular and run several feet along the garage floor, usually near the entrance or corners. While more expensive to install, their design makes them less prone to clogging than round drains.
Understanding what causes these clogs can help you prevent future problems:
For most clogs, you can restore proper drainage with some basic tools and techniques. Here’s Terry’s proven method:
Step 1: Locate and Access the Drain Find your drain by following the slope of your garage floor. Remove the metal grate by either unscrewing the fasteners or carefully prying it up. Check if debris on the grate itself is causing the backup.
Step 2: Inspect and Remove Visible Blockages Put on work gloves and use a flashlight to examine the drain opening. Look for common culprits like leaves, dirt clumps, pet hair, paper products, or other solid debris. Use a small tool like a trowel or screwdriver to carefully extract as much material as possible.
Step 3: Flush with Hot Water Once you’ve removed the visible debris, pour hot (not boiling) water down the drain to break up remaining sediment and push it through the pipes. Avoid chemical drain cleaners, as these can damage your plumbing system and harm the environment.
Step 4: Test and Replace the Grate Clean the grate thoroughly before reinstalling it. Test the drain with a small amount of water to ensure it’s flowing freely. Keep monitoring the area to make sure the problem doesn’t return.
While many garage floor drain clogs respond well to DIY treatment, some situations require professional expertise. If your drain remains slow or backed up after following these steps, you may be dealing with:
Don’t let a stubborn garage floor drain clog disrupt your daily routine or potentially damage your property.
Terry’s Plumbing has the expertise and professional-grade equipment to tackle even the toughest garage floor drain clogs quickly and effectively. Our experienced technicians can diagnose the root cause of your drainage problem and provide lasting solutions that prevent future backups.
Call Terry’s Plumbing today at [YOUR PHONE NUMBER] to schedule your garage floor drain service. We offer same-day appointments and upfront pricing – no surprises, just results.
Don’t wait until a small clog becomes a big problem. Contact Terry’s Plumbing now and get back to using your garage worry-free!
 How Often you Should Clean your Septic Tank
 How to Replace a Toilet Shut-Off Valve
 Power Flushing: What Homeowners Need to Know About Hydrojetting

