
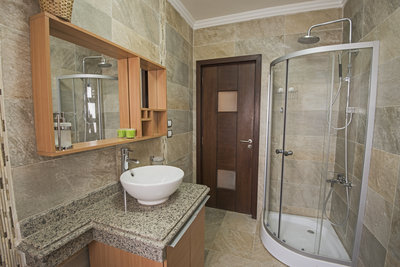
Replacing the shower doors in your bathroom, while not terribly difficult, does require some elbow grease and a few hours of your time. This is a very doable DIY project that many homeowners can handle easily on their own.
A word of caution before you get started: Not all shower doors are designed in exactly the same way. Read the installation instructions before you start on this project, and follow all manufacturer’s recommendations.
Materials
- Screw driver
- Drill
- Masonry bits
- Anchors
- Painter’s tape
- Putty knife
- Caulk
Shower Door Installation Procedure
- Remove the shower doors from their track. To do this, lift up on the outside door and slide it out of the track. Follow the same procedure for the inside door. When the doors have been removed, lift up on the top track and pull it off of the frame.
- Remove the sides and bottom of shower frame. To do this, start by unscrewing the screws. Next, use a utility knife to score the caulk holding the frame in place. Depending on how much caulk there is and how thickly it’s been applied, you may have to dig hard to remove it, so be prepared to put some effort into this process. Once the screws have been undone and the caulk has been removed, take off the shower door frame.
- Use a putty knife to scrape away old caulk. Even after you’ve removed the frame from the shower, some caulk will still remain on the tub. Use a putty knife to scrape away the caulk until the tub is clean.
- Put the new bottom track on the tub. Use painter’s tape to hold the bottom track down on the tub and mark the position of the track with a pencil. Place the track in the center of the tub so that approximately 1/4 of an inch is left on either side.
- Place the side tracks on the tub. Place the side tracks in place on either side of the bottom track, then use painter’s tape to hold the tracks in their spot. Mark their positions with a pencil.
- Screw the frame to the wall. Check the position of the pre-existing screw holes in the wall against the holes in the new shower frame. If the holes line up, use a drill with a masonry screw to widen the holes in the wall, then insert anchors. If the screw holes in the wall don’t line up with the screw holes in the frame, use a drill with a masonry bit to screw new holes into the wall. Either way, screw the frame into the wall after the holes are prepared, then snap the bottom and top track into position.
- Caulk the frame to the wall. Caulk the frame to the wall by applying a bead of caulk along all the edges, then smooth the bead down. Allow the caulk to dry before moving on to the next step. Caulk is easily disturbed, so attempting to put on the shower doors before the caulk has dried can destroy your installation.
- Install the shower doors. You’ll need to angle the doors to get them on the tracks, just as you had to angle them to get them off the doors in the first step.
Voila! You’ve just installed new shower doors.
Contact Terry’s Plumbing
At Terry’s Plumbing, we sell tools that can help with shower door installation. For more information or to talk about our bathroom tools and products, contact us today at (412) 364-9114.
 What is Pipe Descaling and Why is it Important?
 Can’t Find Your Septic Tank? Here’s Your Complete Guide to Locating It
 How to Clear a Stubborn Garage Floor Drain Clog

